Pages

Wednesday, August 11, 2010

I'm BAAAACCCKKKK!

It's been about a month and I'm slowly coming back to blogging and crafting.  This summer has been fun and busy but I think I am ready for school to start.  Although I am not looking forward to the early mornings...my friends know what I mean.  I like to sleep!


I was browsing my favorite blogs this morning and came across this darling little freebie from Vol. 25.  Love love love this site and her amazing talent.  Go check it out...you won't be dissappointed. 
It's a fun little craft for your kiddos and to keep them busy when momma needs some peace and quiet.  I like crafts like those.  :)

Thursday, July 8, 2010

Silhouette cutting tool Giveaway!

I'm BACK from another little blogging break.  Being a momma is busy and my kids are my first priority so I haven't been doing a lot of crafting lately - just fun summer stuff!  I was browsing some blogs this morning and came across one of my favorites - Little Birdie Secrets.  They are having an awesome GIVEAWAY!!  Go check out their blog for details.  I want one REALLY bad.   Can you imagine the craftiness you could make with this thing?  AWESOME!!   

Monday, June 14, 2010

Father's Day Gift Ideas

It's that time of year my friends - Father's Day, and boy to I have a ton of fun ideas I have found around the web.  There is some amazing talent out there and it's so fun to see what people have come up with.  So check it out!

Easy Crafts for Kids - Family Fun had a bunch of cute ideas that your kids can do.  Take a look at their printables page for things that your kids can color and give to their dads.

Best Ever BBQ Apron - I thought this one was cute - especially if your Daddo is a BBQ Master.  What a fun way to have a personalized reminder of the little ones that he is cooking for!

How about these Retro Father's Day Clip-Art Labels from Martha.  You can download the clipart from her site.

Etsy always has the perfect gift for any occasion.  Check out these custom silhouettes from Blue Clara that you can have made of your children.  I would order these for my husband but they secretly would be for me. 


Homemade cards are always the way to go.  Kristina Werner of Kwerner Design made some adorable Father's Day cards - and she even has a You Tube tutorial!


Here is another idea - similar to Martha's but even cuter....if you can imagine that!  This was my first gift idea that I found and I was hooked.   It's a SUPER HERO CARE PACKAGE and I found it on Alphamom.  The kids are so excited to make these for their Daddo this week - good thing he doesn't check this blog or his gift would be busted!

Have fun getting crafty for Father's Day!  Send me your ideas.

Tuesday, June 8, 2010

Terra Cotta Coasters


I just found a new cute craft blog today.  Sweet Charli.  They have some really fun things.  I saw this tutorial how to make your own coasters!  I've seen the other ones with the tumbled marble and stamps but these were just adorable.  Check them out!


Monday, May 31, 2010

Fun Photo Blocks

Happy Memorial Day!  Hope everyone enjoyed their day celebrating and remembering those who have given their lives for our freedom.  We are truly blessed! 

Just wanted to share some fun photo blocks that I made for Mother's Day for my MIL.  These are all the grandkids on my husband's side of the family so I thought it was a fun way to display all the kiddos together.  I just took a 2x4, measured the size I wanted, cut, sanded, painted, sanded some more and then glued my pictures on them.  It's a fun and different way to display photos in your home.  You can always cut the blocks a little bigger than your picture and add scrapbook paper behind it, add a ribbon around the block or some cute knobs to go on the top.  All fun ways to be creative!


Wednesday, May 19, 2010

Tweet Tweet

I've been crafting up a storm over here, sewing, quilting, modpodging and hot glueing. FUN STUFF! Wondering what I've been doing?? Well here's one little sweet project. Miss G and I were at our favorite store today - Hobby Lobby....well ok, my favorite store. I usually hear, "not Hobby Lobby!!" We just happened down the 66% off Home Decor aisle and found this cute little bird cage and thought we would add a nest and a little birdy in it to hang in G's room. It was a fun mommy daughter project. I thought it turned out pretty cute and it looks so fun hanging on the curtain rod in front of her window. Not a bad deal at $3.00 for the cage, $1.59 for the birds and $1.99 for the nests. Total cost = SWEETNESS!

Monday, May 17, 2010

I'm Back.....and a Reminder

I'm back from my big ol' trip and ready to start blogging again.  But I just wanted to send out a reminder to check out Becky Higgins blog today for a spotlight on me and my photography!  Leave a comment for you or someone you know that needs family pictures done and you might be the lucky ducky who gets a free session with me! Tell everyone you know. It's so exciting!!!

Monday, May 3, 2010

Hello?....anybody home?

That's what my Miss G says when we all walk into the house.  I don't know who she's expecting but it's sure darn cute.  But just to let you know, I am here.  Just been MIA lately cause life is just busy ya know?  I haven't forgotten about you, I'm just getting ready for a BIG trip!  I'm sure I'll be creatively inspired and full of artsy ideas when I return from my trip with the hubs to EUROPE!!!!  Can you tell I'm excited? 

So I bid you adeu until next week when I return and leave you with some more exciting news....  So anyone who does any kind of scrapbooking - digital or paper or photography knows who the famous Becky Higgins is. I am so excited to be apart of her BIG PHOTOGRAPHY GIVEAWAY! There are over 150 photographers from all across the country giving away photo shoots to a deserving family in the month of May. 5 photographers will be featured on her blog every day for the whole month of May. My day is May 17th! If you are in my area (Dallas/Fort Worth/Denton -Texas) or know of a family that wants a fun photo shoot, leave a comment on Becky's blog on May 17th and you might just be the lucky winner!

Tuesday, April 20, 2010

No use cryin'.....

I've been busy around here, not with crafts.  With this little guy. 
 He's into EVERYTHING these days, mostly my kitchen cupboards.  He's playing so nicely with pots and pans, giggling and making noise to his hearts content until I hear C-R-A-S-H!  Don't know how he did it but somehow pulled down a heavy crystal bowl and an antique platter  - both of which didn't break, but this did. 
My one-of-a-kind hand painted plate from Mexico from my one year anniversary trip with my hubs. I am bummed, yes, but what do you do when you see this FACE?
My son E saw the broken pieces and went, "oooh, an art project?"  And then realized what had happened.  Maybe he has an idea there!  Don't know if it's worth the effort super glueing back together.  It just might be finding it's new home in a garden stone.  

Tuesday, April 13, 2010

Tie Onesie Applique Tutorial using leftover Dryer Sheets

Photobucket
I know what you're thinking....Dryer Sheets?  But why not....you've already used them for one purpose, why not use them for another instead of throwing them away?  I found some other sites that used them as a backing or stabilizer on the inside of their applique like over at V & Co.

I'm going to use it as a backing to go on the inside of my onesie.  I followed the tie pattern that Char created over at Crap I've Made.  I just changed the directions and materials up a bit.  Take a look!

Photobucket

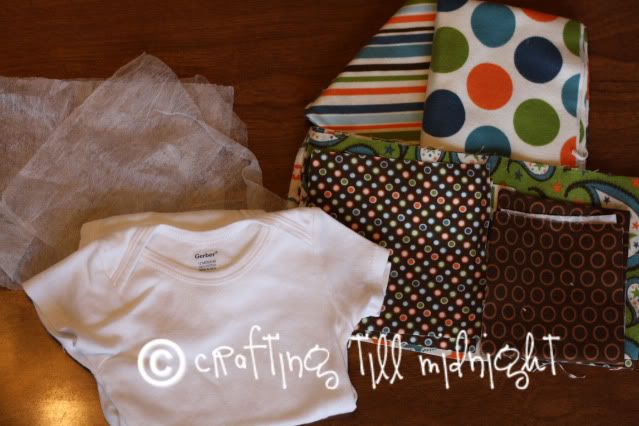
Materials
Baby bodysuit or tee
Tie pattern (see link to pdf above)
Fabric scraps for tie
Used Dryer Sheet
Quilt Basting Spray
Thread
Sewing machine

Instructions
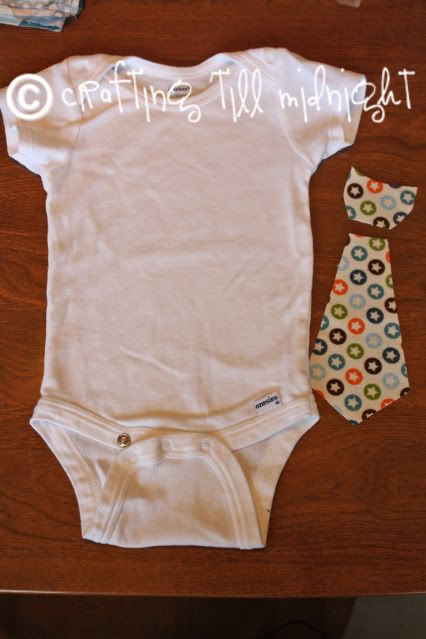
Print tie pattern and cut out
Trace onto your fabric or lay the pieces out and pin in place.  I used some leftover fabric by Riley Blake. LOVE IT!
Cut out tie pattern on your fabric

Photobucket

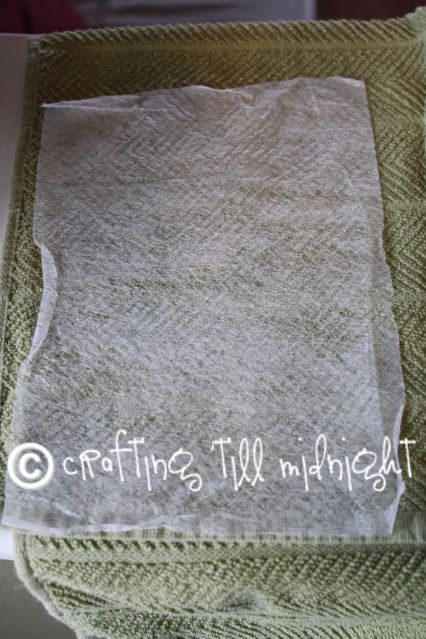
Using a cool Iron, iron your dryer sheet to smooth out any wrinkles - it doesn't have to be perfect (place the dryer sheet in between a towel to prevent sticking to your iron.)

Photobucket

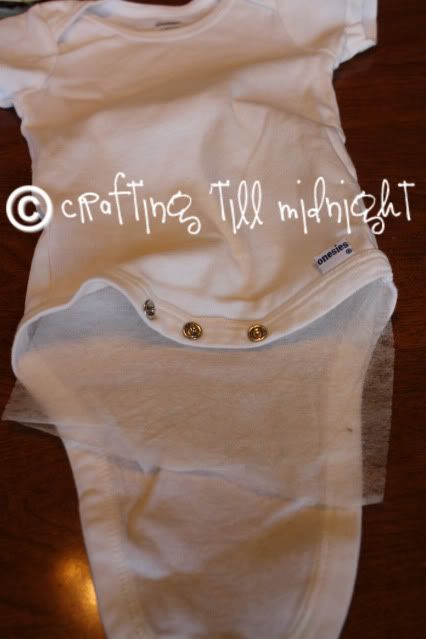
Place your neatly ironed dryer sheet inside your onesie covering the area where you will be appliqueing.

Photobucket

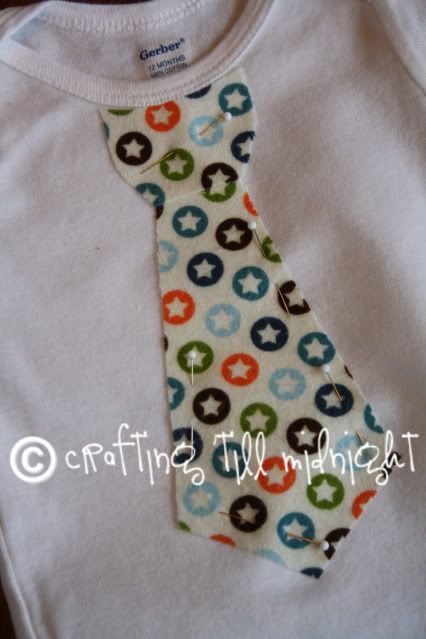
Using your basting spray, spray the backing of your tie pieces and lay them in place on your onesie - making sure that you lay the tie piece first, then the 'knot' piece on top, overlapping 1/4".

Photobucket

Eventhough you've basted the tie in place, you are going to pin the fabric to your dryer sheet on the inside to hold it in place.

Photobucket


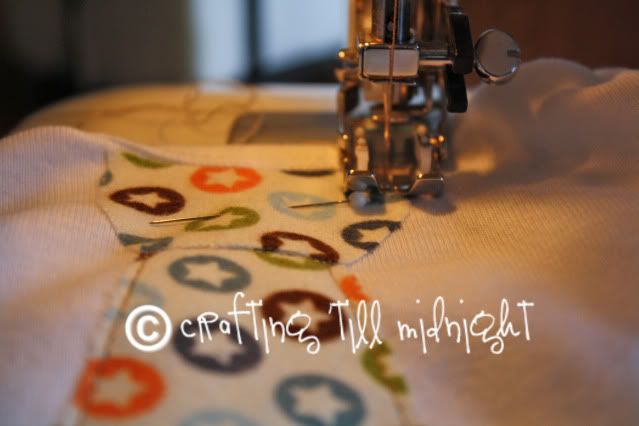
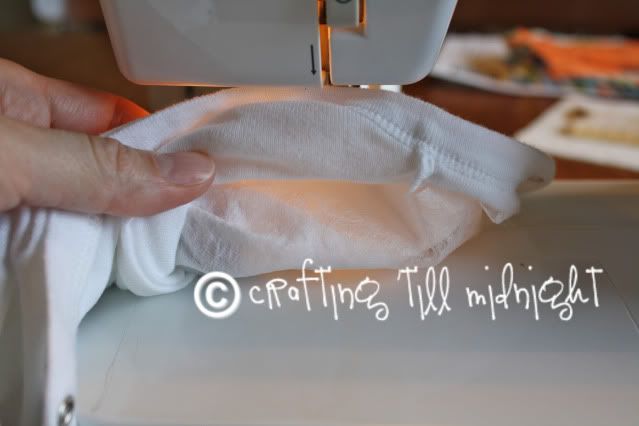
Start sewing!  Make sure that you pull the back of your onesie out of the way so you aren't sewing something you don't want sewed.  Can't tell you how many times I've done this.  Just have patience and go slow!

Photobucket Photobucket

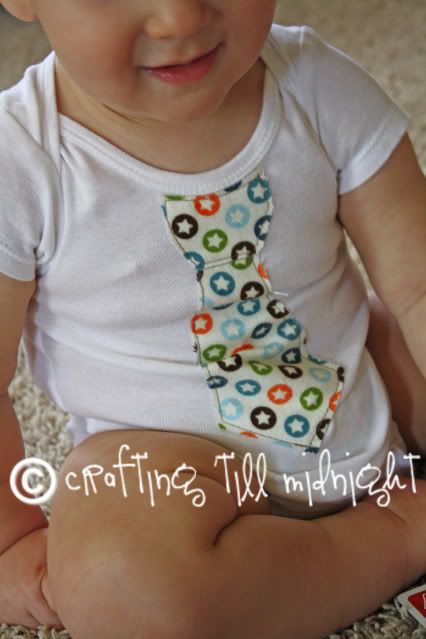
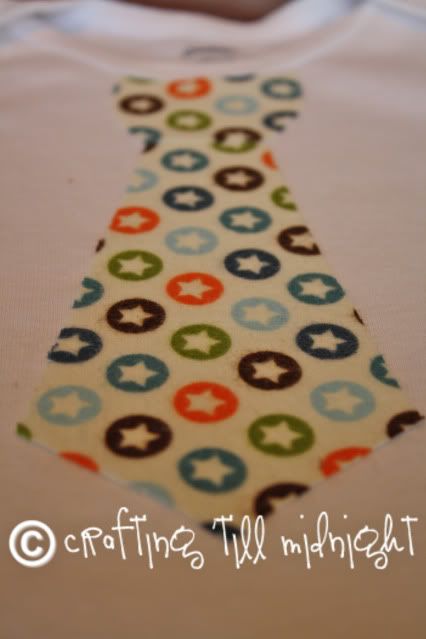
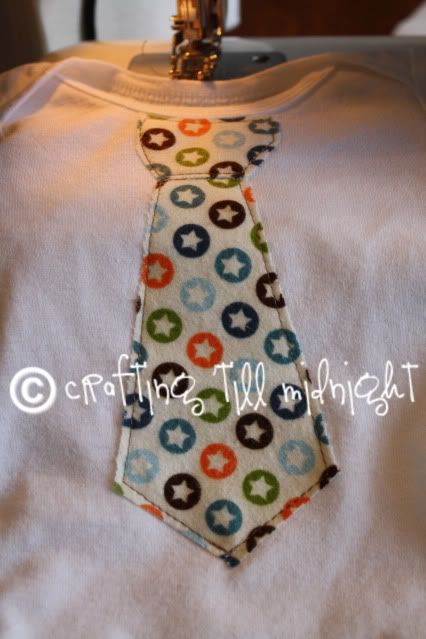
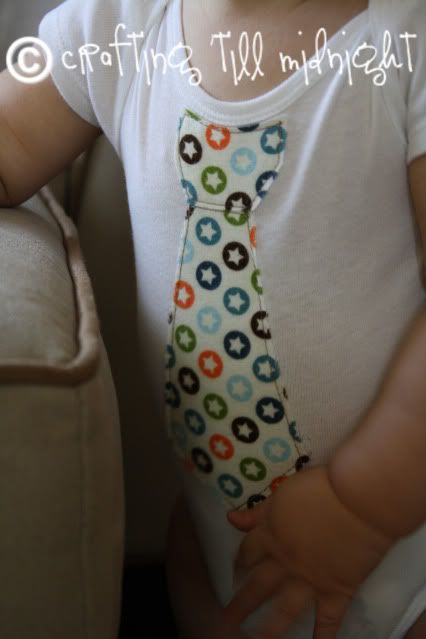
When you've sewn all the way around all the edges it should look something like this on the outside

Photobucket

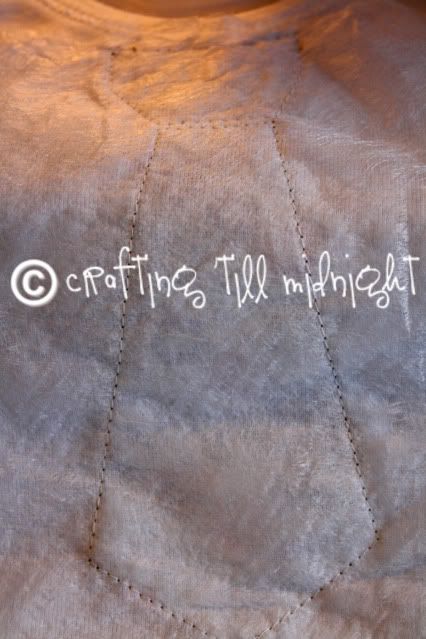
And this on the inside

Photobucket

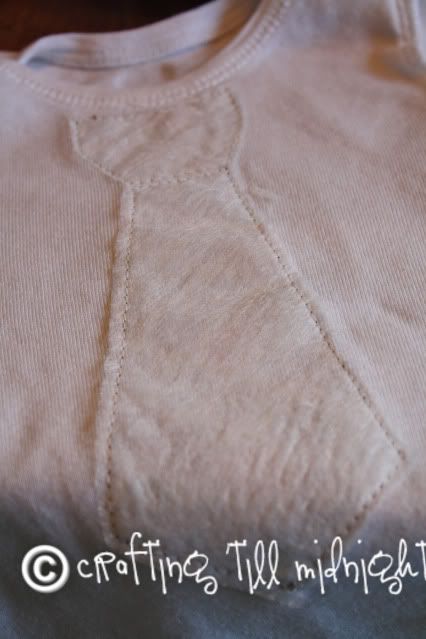
Take your scissors and carefully trim the excess dryer sheet around the area you have sewn so you have a nice clean edge.

Photobucket

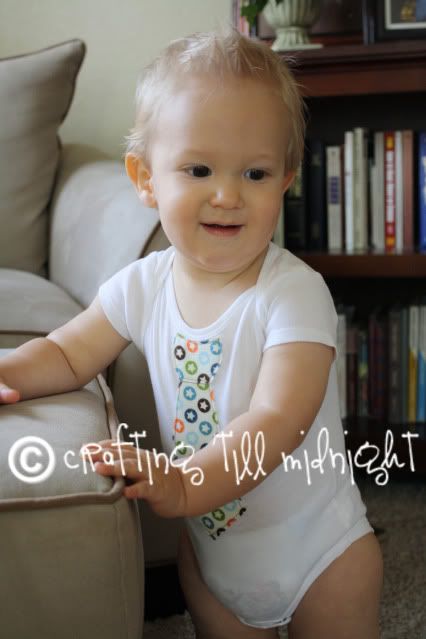
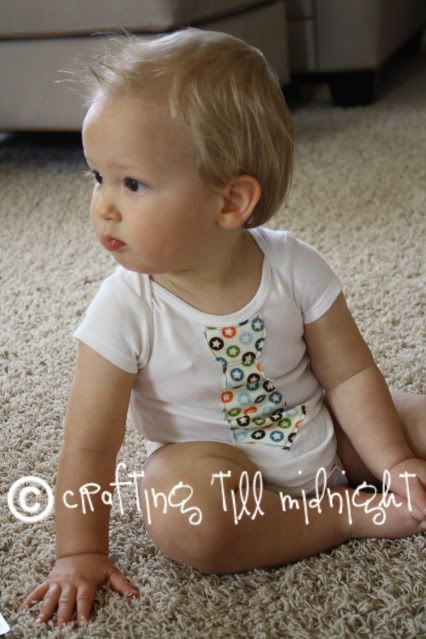
Isn't that the cutest thing?  Now go find yourself a handsome little man to model for you and snap away!  Although I think this little man needed a diaper change and the onesie is a bit small.  But it's just so darn cute.

Photobucket

These are the perfect gift for a baby shower.  It's cute, handmade, one of a kind because it's made by you and very thoughtful.  Who wouldn't love it!

Photobucket

Photobucket

Now go get crafting!

Wednesday, April 7, 2010

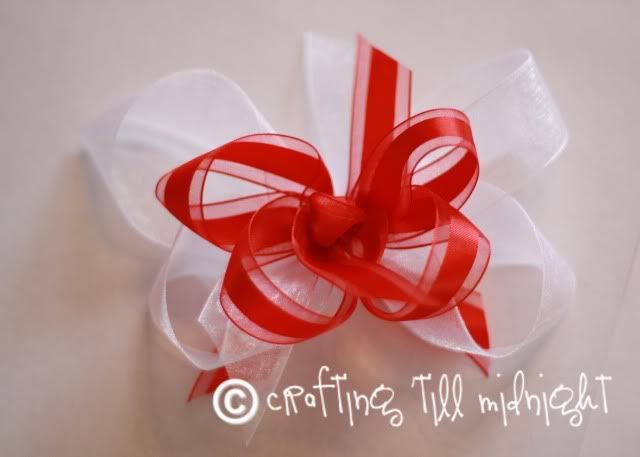
You asked for it....Boutique Ribbon Hairbow Tutorial!

I've had many of you email me and ask for a hairbow tutorial so I've been working on one this morning to send on over to you out in cyber world for you to enjoy.  Hope it helps and that you make some fantastic bows! 

Supplies Needed
Ribbon
Wire
Scissors
Hardware (clips)
Hot glue gun and hot glue
Fray check

Ribbon
I would suggest purchasing ribbon at Walmart, Hobby Lobby, JoAnn’s, Michaels, or any other craft store.

Wire
I recommend using 24-26 gauge wire to hold the bows together. I know a lot of people who sew their bows, which is fine, but I think wire is much easier to use as the ribbon won’t slide when anchoring the pieces together.

Again, I like to purchase my wire at Walmart, Hobby Lobby, JoAnn’s, Michaels, or any other craft store. Make sure you are using the cheapest wire possible and gold wire is not necessary.
 
Hardware
When I say hardware, I’m referring to alligator clips (pinch clips) and French barrettes.  If you are going to be making a lot of bows, I would suggest visiting a Sally Beauty Supply near you.  It is an excellent source for alligator clips as they are cheaper there. You can purchase 100 clips for about $4.50. You will also be able to find French barrettes there too.

Scissors
You will need to use a very sharp pair of scissor to ensure a nice, blunt straight line.


Method to sealing ribbon ends
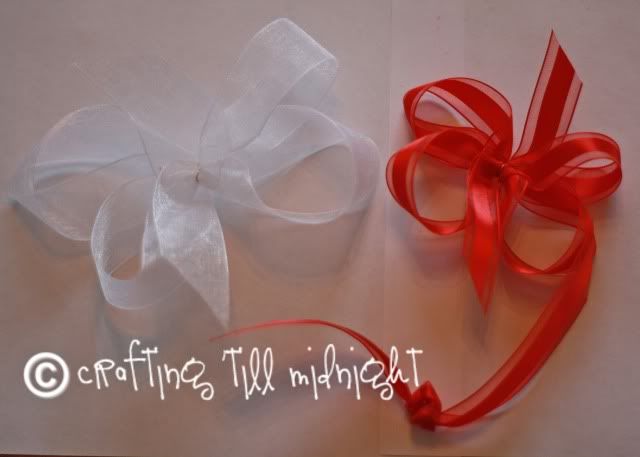
It is necessary to seal the end of the ribbon or else your ribbon will fray. When I make layered bows, I like to seal the ends in between layers for easier access.  I use Fray check such as “Aleenes’s” or “Dritz.” When doing so, carefully dab a teeny-tiny bit on the end of the ribbon. If you use too much it could discolor ribbon. Also make sure that you allow each end to dry thoroughly before wearing or stacking the layers as it will stick to whatever it comes in contact with. Also if you are doing a layered bow, make sure you allow the ends to try in between layers.

How much ribbon for one hair bow?
I have found that when I try to measure my ribbon and cut it before I build my bow I end up making it smaller or bigger than I anticipated.  So I leave it on the roll and work with it as I go.  When I get the size I want, I cut it off. 

Instructions
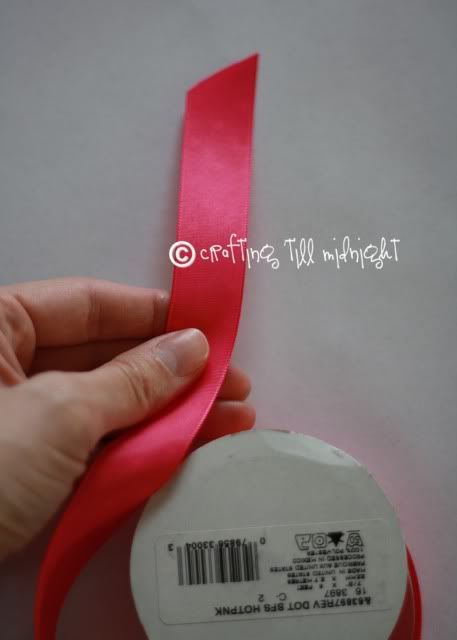
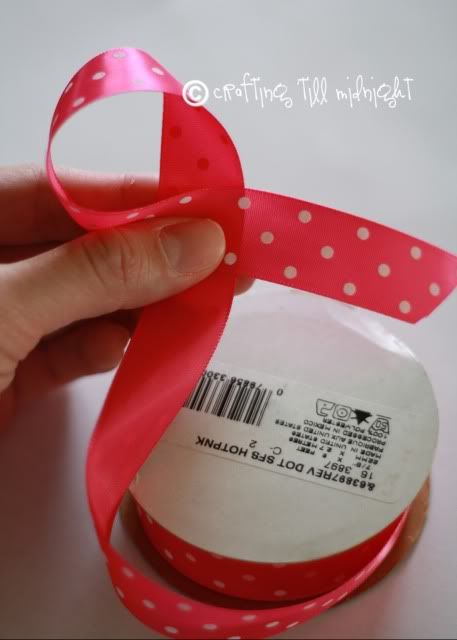
1. Grab your ribbon - still on the spool and and hold it vertically in front of you with your left hand. If you have a pattern, it will be on the other side (the back of the ribbon will be facing you)

Photobucket


2. As you continue to hold the ribbon, take your right hand and grab the top of the ribbon
and cross it over the ribbon as shown. Notice the placement of my hand. Since you were
folding with your right hand, you will want to have the ribbon anchored at this point with
your left hand.

Photobucket

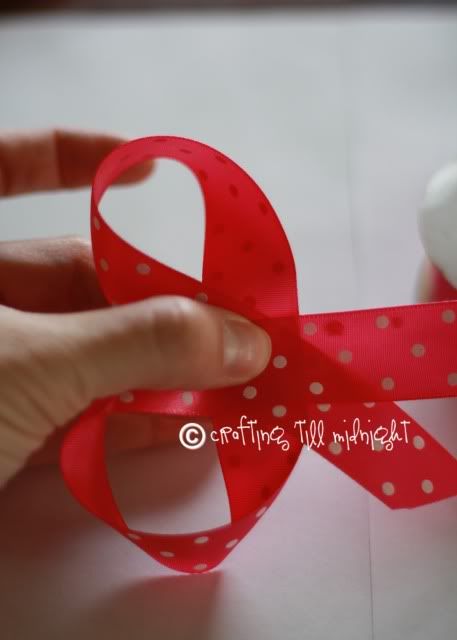
3. Continue to hold the first loop you made with your left hand. Now with your right
hand, grab the tail that is hanging downward and bring it up over itself. This will
form the bottom part of your bow.

Photobucket


4. This is where it can get a bit tricky. Continue to hold and anchor the part you
already folded with your left hand. Your right hand will do all the work. Now take
the tail that was pointing upward and fold it underneath itself and bring it down. Let
the loose tail just drop down.

Photobucket

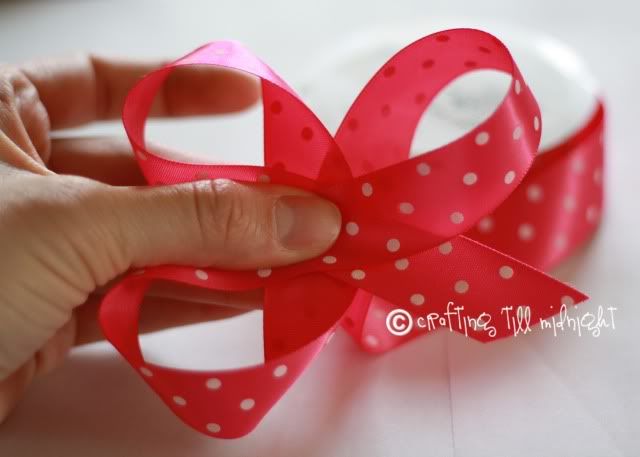
5. During this step you won’t make any additional loops. Instead you will be
checking your work before you progress to the next step. I advise that you continue
to hold and anchor with your left hand. Smash down the two loops as shown in the
illustration. You are doing this to ensure a symmetrical bow. You don’t want one
side longer or higher than the other. GENTLY pull the loose tail, if necessary, so it
lines up as closely as possibly to form a horizontal line. Once you do that, reanchor
and hold with your left hand. (Picture below is what it looks like from the back.)

Photobucket

Photobucket


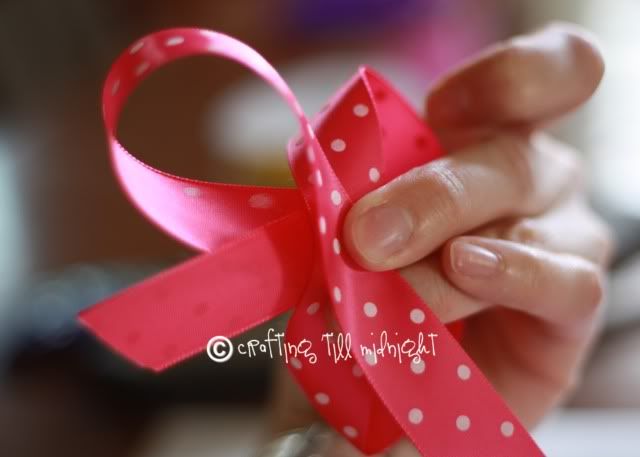
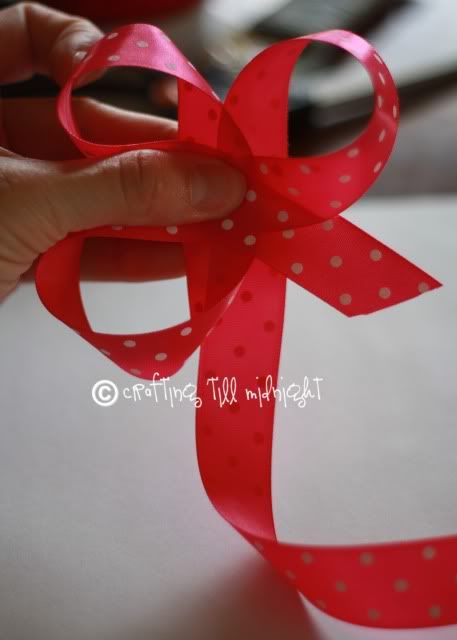
6. Now take the tail that was handing downward and bring it UP and align it with
the bottom layer. Just like you did in Step #5 with smashing the two top
loops to check for symmetry, please do the same for the bottom two loops. Adjust
where necessary.

Photobucket


Creasing the Center
This is where you need to be especially careful! If your hand slips, you will need to start the process all over again. Make sure you don’t rush and take your time during this step!


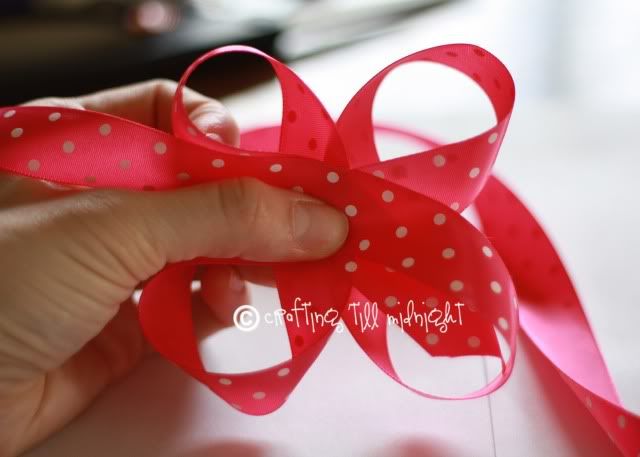
1. Continue to hold the bow in your left hand. Eyeball the center point. At this
center point, fold the bow in half, with the folded part pointing down. Make sure
you do this very carefully because the ribbon has a tendency to slip at this point.

Photobucket

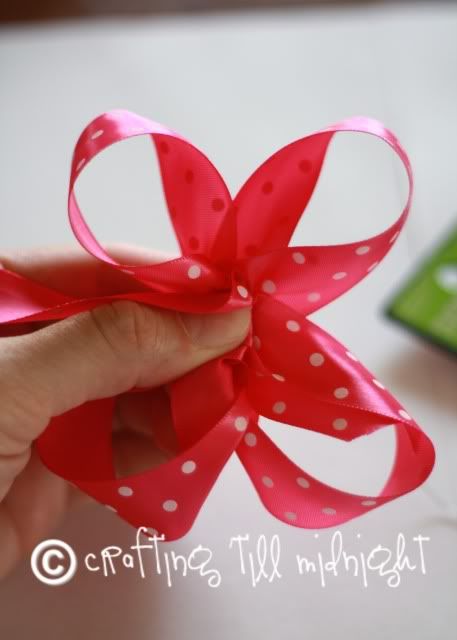
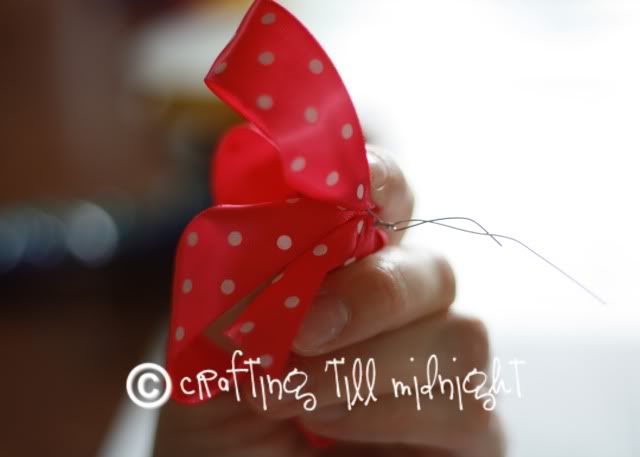
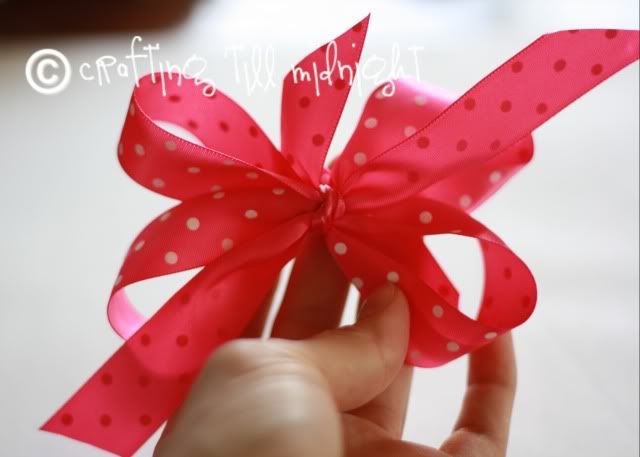
2. Squeeze the center of the ribbon so all the points connect and come together.  Take your wire and carefully twist around the center of the bow.  Once you are finished twisting the wire, cut excess off and fold the twisted part down so it is flush against the ribbon.

Photobucket


Photobucket


Making the Bow Center Knot

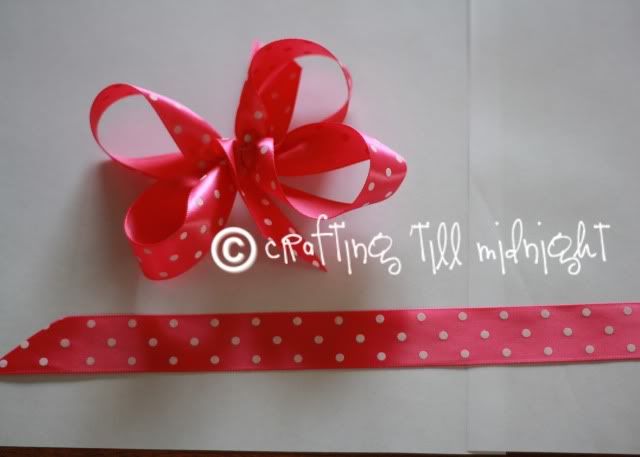
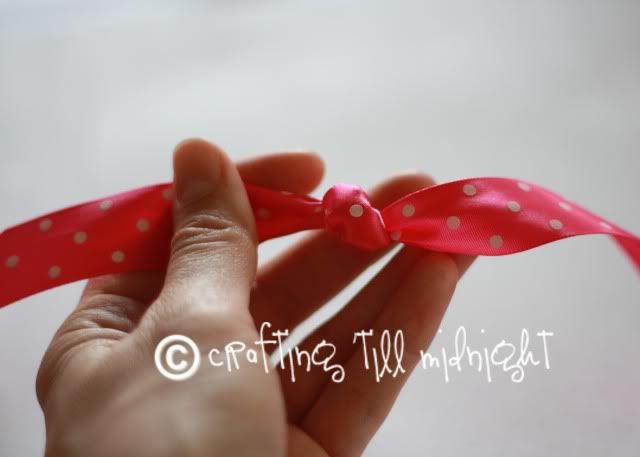
Cut a piece of the same ribbon you used to make your bow or coordinating color.  Tie in a double knot so you have a nice little bump in the center of your ribbon.  

Photobucket


Photobucket


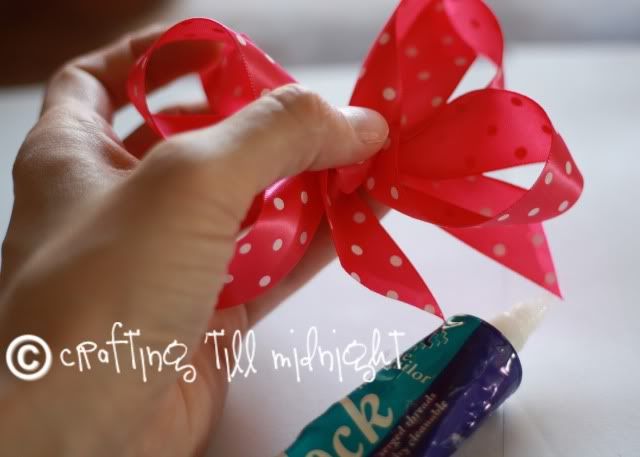
To hold it in place before tieing, you can always put a dot of hot glue on your bow in the center and then add your center knot to hold it in place.

Photobucket


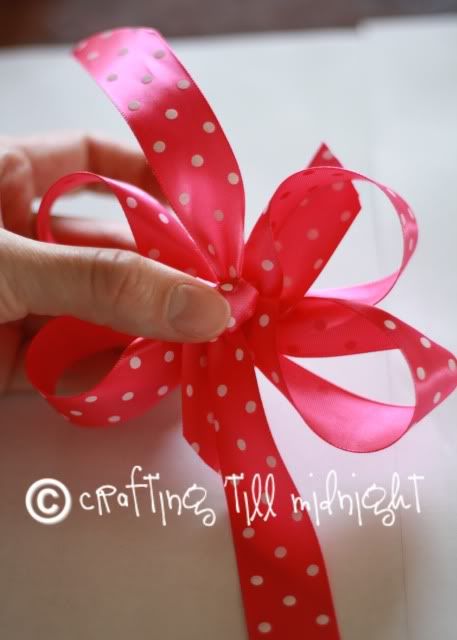
Tie the center knot ribbon all the way around the bow and secure in the back.  I like to leave my "tails" long so that you can see them in the front.  Trim the edges.  You can always cut them off shorter or glue them to the back if you don't want them to show.

Photobucket


Photobucket


Add your aligator clip or french barette to the back securing with hot glue.  If you use a French barrette, you will need to first open the barrette and remove the center bar.  Apply some hot glue to the underneath side of the bow (about the size of a marble) and attach your clip. Hold it in place while it dries. If you are using an alligator clip, you will need to do the same, except make sure you have the clip open while doing this step otherwise you will glue the clip together.  (sorry I don't have a picture - I'm out of clips!)

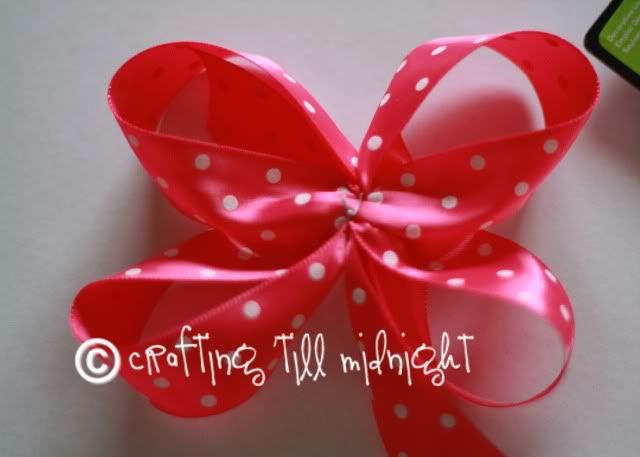
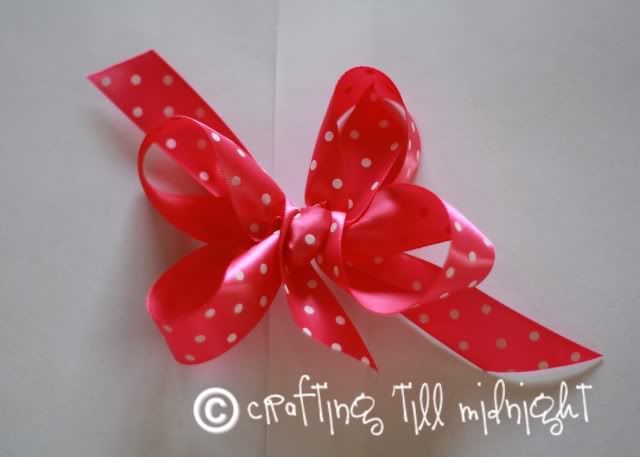
And there you have it!  Your finished bow.  Add fray check to each edge of unfinished ribbon to prevent fraying. 

Photobucket


If you want to make a layered bow with coordinating ribbon just simply make your starting bow, and then add another layered bow on top just a little bit smaller than your original one following the same instructions above.

Photobucket


Photobucket


Ta da!  You've mastered the art of boutique bow making!  Now keep practicing.  You'll just get better and faster.  Have fun!
Related Posts with Thumbnails