
I've had many of you email me and ask for a hairbow tutorial so I've been working on one this morning to send on over to you out in cyber world for you to enjoy. Hope it helps and that you make some fantastic bows!
Supplies Needed
Ribbon
Wire
Scissors
Hardware (clips)
Hot glue gun and hot glue
Fray check
 Ribbon
I would suggest purchasing ribbon at Walmart, Hobby Lobby, JoAnn’s, Michaels, or any other craft store.
Wire
I recommend using 24-26 gauge wire to hold the bows together. I know a lot of people who sew their bows, which is fine, but I think wire is much easier to use as the ribbon won’t slide when anchoring the pieces together.
Again, I like to purchase my wire at Walmart, Hobby Lobby, JoAnn’s, Michaels, or any other craft store. Make sure you are using the cheapest wire possible and gold wire is not necessary.
Hardware
When I say hardware, I’m referring to alligator clips (pinch clips) and French barrettes. If you are going to be making a lot of bows, I would suggest visiting a Sally Beauty Supply near you. It is an excellent source for alligator clips as they are cheaper there. You can purchase 100 clips for about $4.50. You will also be able to find French barrettes there too.
Scissors
You will need to use a very sharp pair of scissor to ensure a nice, blunt straight line.
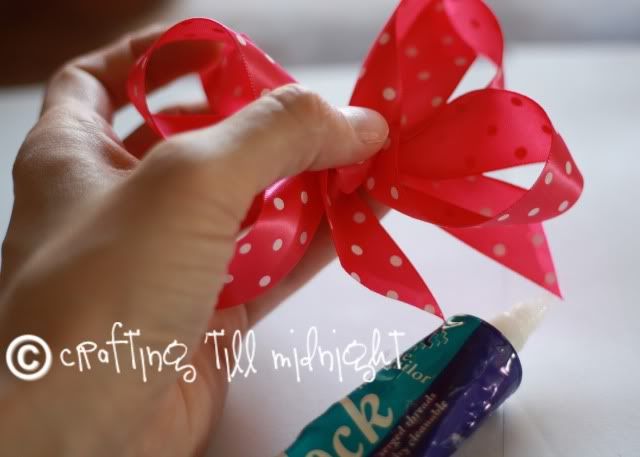
Method to sealing ribbon ends
It is necessary to seal the end of the ribbon or else your ribbon will fray. When I make layered bows, I like to seal the ends in between layers for easier access. I use Fray check such as “Aleenes’s” or “Dritz.” When doing so, carefully dab a teeny-tiny bit on the end of the ribbon. If you use too much it could discolor ribbon. Also make sure that you allow each end to dry thoroughly before wearing or stacking the layers as it will stick to whatever it comes in contact with. Also if you are doing a layered bow, make sure you allow the ends to try in between layers.
How much ribbon for one hair bow?
I have found that when I try to measure my ribbon and cut it before I build my bow I end up making it smaller or bigger than I anticipated. So I leave it on the roll and work with it as I go. When I get the size I want, I cut it off.
Instructions
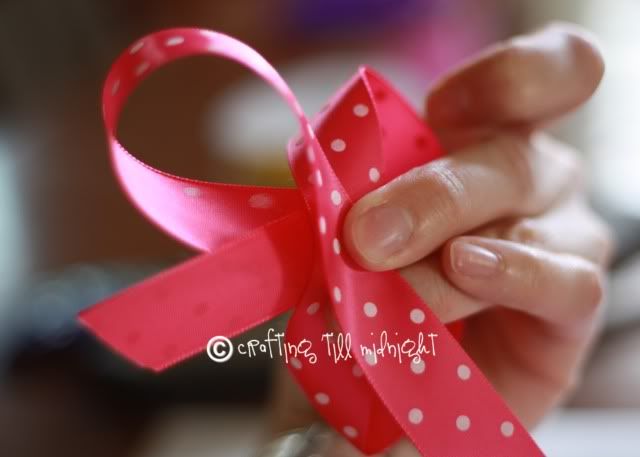
1. Grab your ribbon - still on the spool and and hold it vertically in front of you with your left hand. If you have a pattern, it will be on the other side (the back of the ribbon will be facing you)
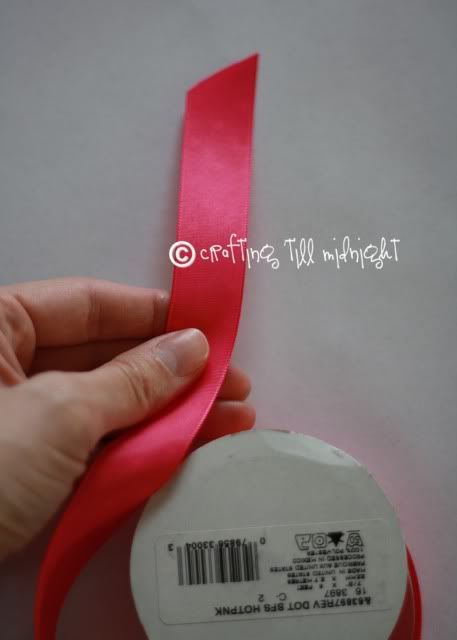
2. As you continue to hold the ribbon, take your right hand and grab the top of the ribbon
and cross it over the ribbon as shown. Notice the placement of my hand. Since you were
folding with your right hand, you will want to have the ribbon anchored at this point with
your left hand.
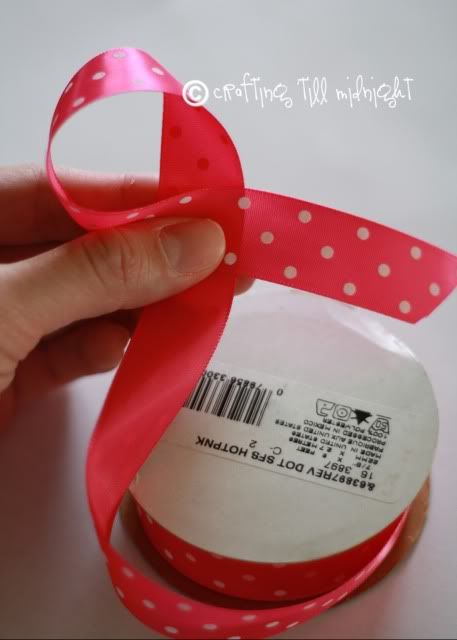
3. Continue to hold the first loop you made with your left hand. Now with your right
hand, grab the tail that is hanging downward and bring it up over itself. This will
form the bottom part of your bow.
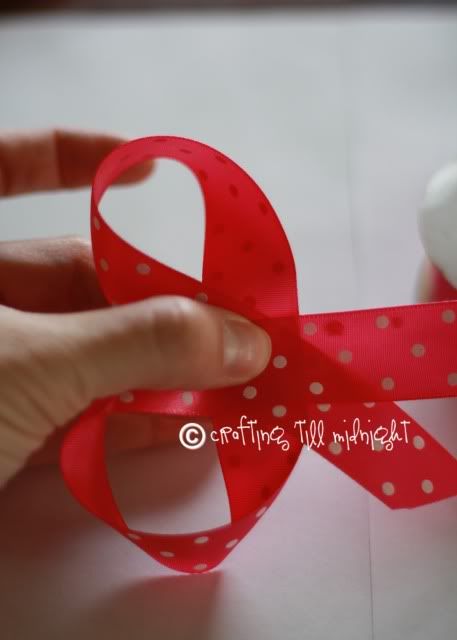
4. This is where it can get a bit tricky. Continue to hold and anchor the part you
already folded with your left hand. Your right hand will do all the work. Now take
the tail that was pointing upward and fold it underneath itself and bring it down. Let
the loose tail just drop down.
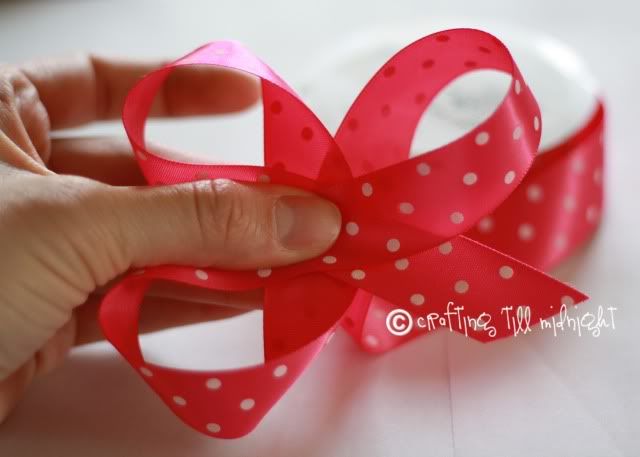
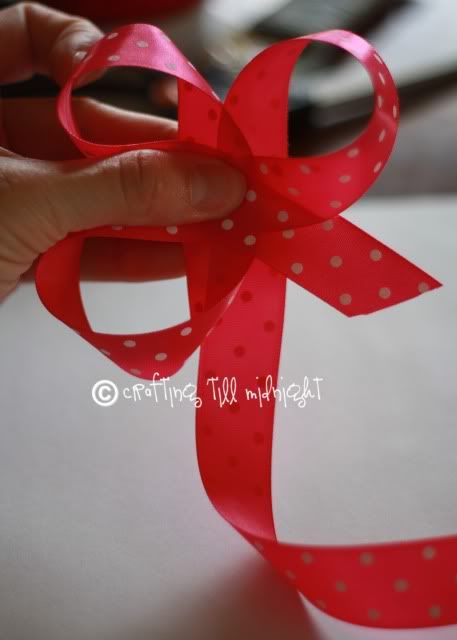
5. During this step you won’t make any additional loops. Instead you will be
checking your work before you progress to the next step. I advise that you continue
to hold and anchor with your left hand. Smash down the two loops as shown in the
illustration. You are doing this to ensure a symmetrical bow. You don’t want one
side longer or higher than the other. GENTLY pull the loose tail, if necessary, so it
lines up as closely as possibly to form a horizontal line. Once you do that, reanchor
and hold with your left hand. (Picture below is what it looks like from the back.)
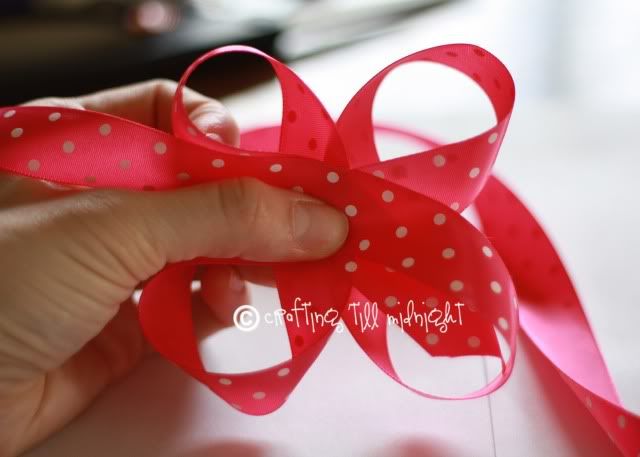
6. Now take the tail that was handing downward and bring it UP and align it with
the bottom layer. Just like you did in Step #5 with smashing the two top
loops to check for symmetry, please do the same for the bottom two loops. Adjust
where necessary.
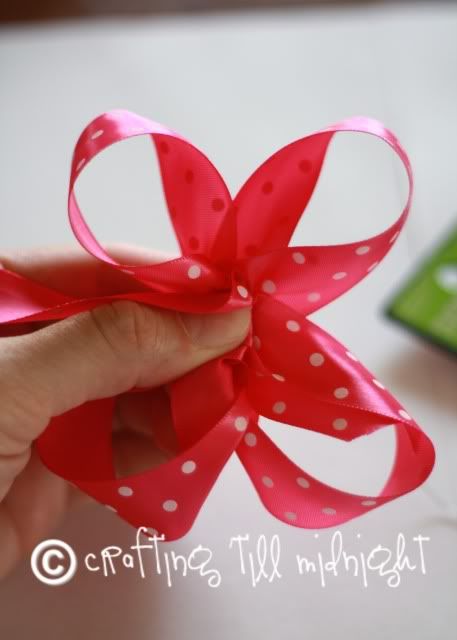
Creasing the Center
This is where you need to be especially careful! If your hand slips, you will need to start the process all over again. Make sure you don’t rush and take your time during this step!
1. Continue to hold the bow in your left hand. Eyeball the center point. At this
center point, fold the bow in half, with the folded part pointing down. Make sure
you do this very carefully because the ribbon has a tendency to slip at this point.
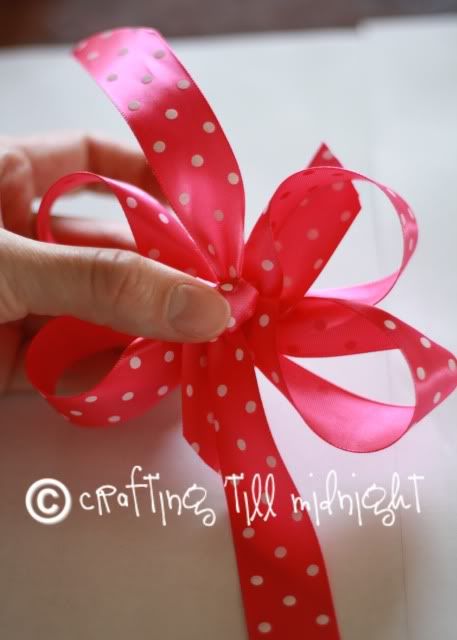
2. Squeeze the center of the ribbon so all the points connect and come together. Take your wire and carefully twist around the center of the bow. Once you are finished twisting the wire, cut excess off and fold the twisted part down so it is flush against the ribbon.

Making the Bow Center Knot
Cut a piece of the same ribbon you used to make your bow or coordinating color. Tie in a double knot so you have a nice little bump in the center of your ribbon.

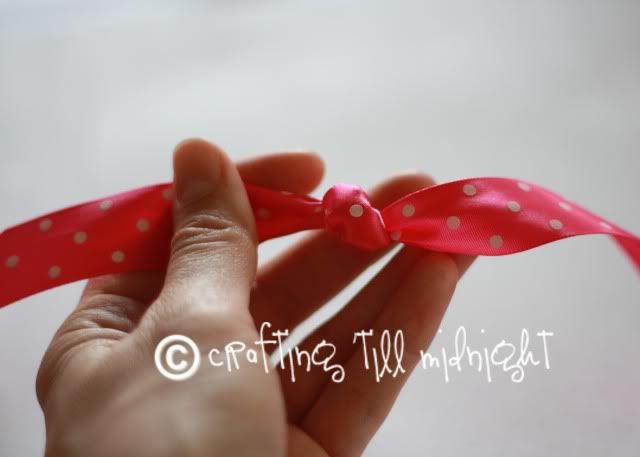
To hold it in place before tieing, you can always put a dot of hot glue on your bow in the center and then add your center knot to hold it in place.
Tie the center knot ribbon all the way around the bow and secure in the back. I like to leave my "tails" long so that you can see them in the front. Trim the edges. You can always cut them off shorter or glue them to the back if you don't want them to show.
Add your aligator clip or french barette to the back securing with hot glue. If you use a French barrette, you will need to first open the barrette and remove the center bar. Apply some hot glue to the underneath side of the bow (about the size of a marble) and attach your clip. Hold it in place while it dries. If you are using an alligator clip, you will need to do the same, except make sure you have the clip open while doing this step otherwise you will glue the clip together. (sorry I don't have a picture - I'm out of clips!)
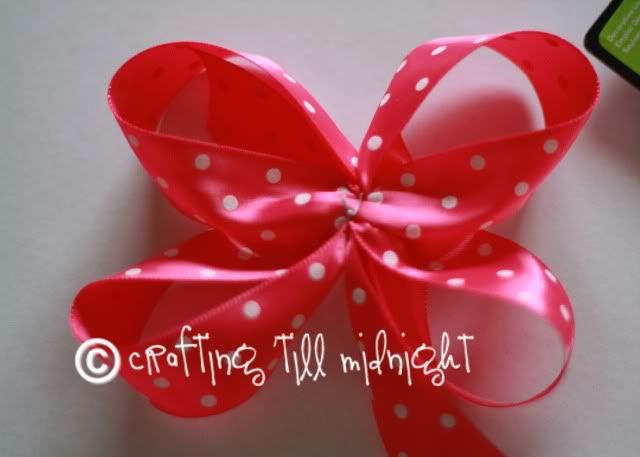
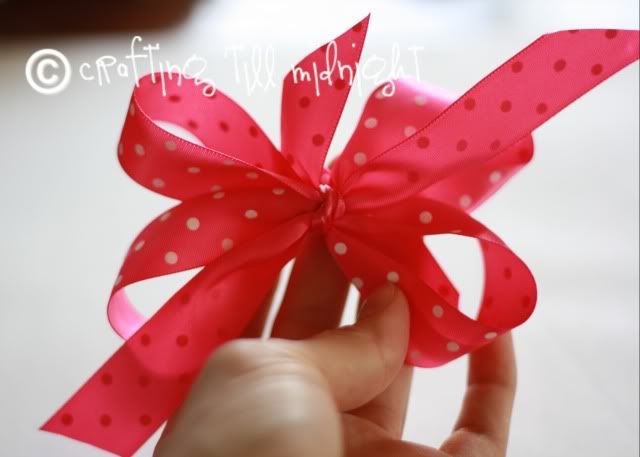
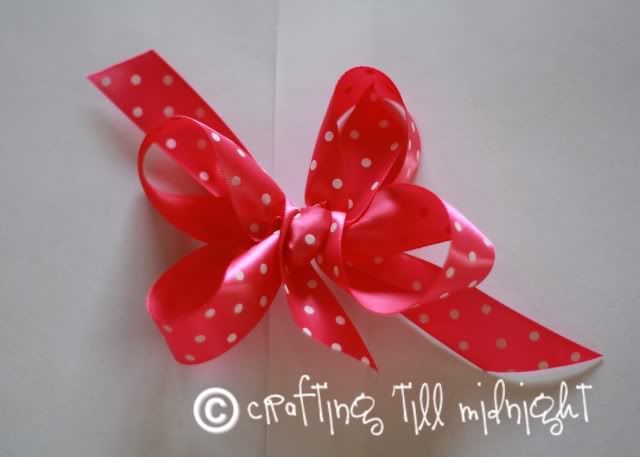
And there you have it! Your finished bow. Add fray check to each edge of unfinished ribbon to prevent fraying.
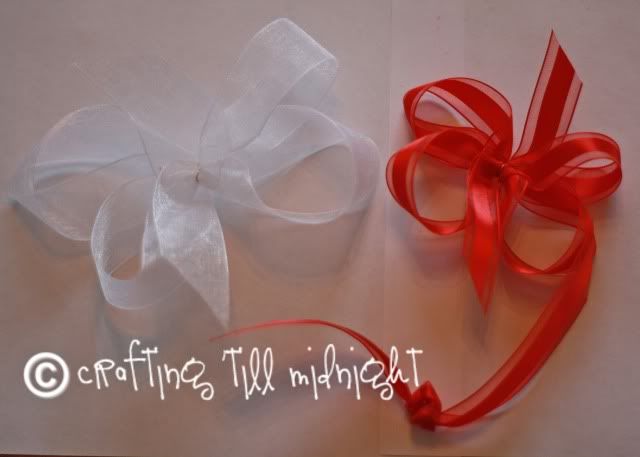
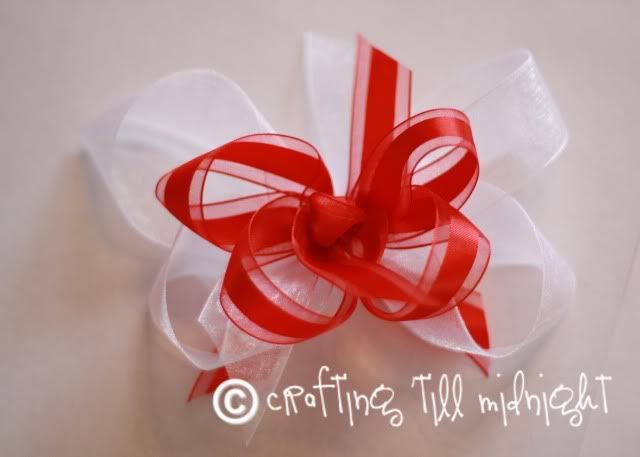
If you want to make a layered bow with coordinating ribbon just simply make your starting bow, and then add another layered bow on top just a little bit smaller than your original one following the same instructions above.
Ta da! You've mastered the art of boutique bow making! Now keep practicing. You'll just get better and faster. Have fun!


Thanks Jenna! You are the woman! I can't wait to make some bows!
ReplyDelete